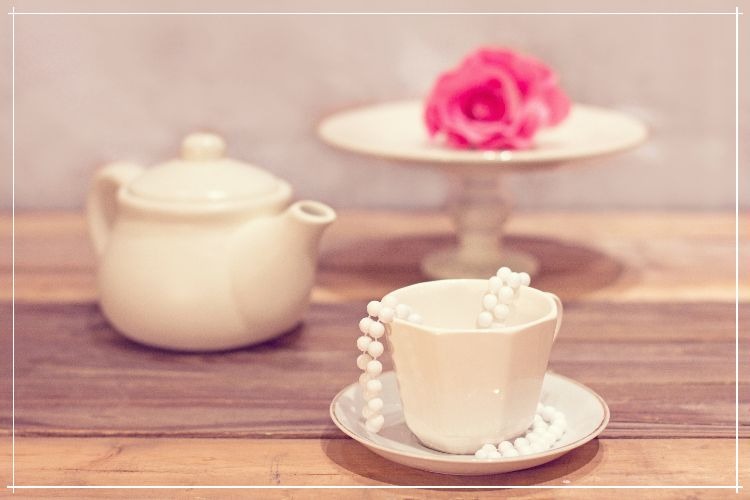
You know I love projects! Just check out my foot scrub here! My craft room is currently under construction making it a little difficult to navigate. Despite my chaotic space, I can’t stop crafting. That is just nonsense. So I decided I would keep it small, literally, and fun. And bonus: it makes my house smell so good! I have a dog and three cats, so the last thing I want is for my house to smell like the “kids”. Let’s just say they are not always the best smelling pair and the creation of any candle is worth it just for that fact alone.
However I decided rather than keep this little love for myself, I would share the love with my boss. She has been amazing and she is deserved a little something extra. If you are looking for a project you can do in an hour or less and add a little pizzazz to your home. This is the one for you!
The Basics
So here is what you need:
Teacup
Soy wax flakes
Essential oil
Wick
That’s it. So far, so simple! Now for the “practical” tools to make this creation a success.
Measuring cup
Measuring spoon
Two pots (unless you have an actual double boiler)
Thermometer
Wisk
First Prep Your Teacup
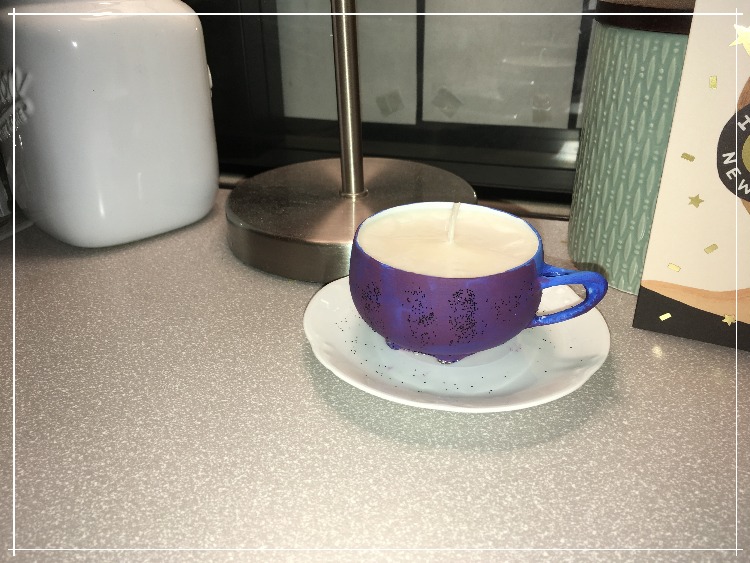
I found a tiny teacup and saucer that I picked up from Goodwill on a half price day. If you need some ideas about where to get your thrifty items check out this post. I tried to glue the bottom of my cup to the saucer because I have a tendency to “clean up” and forget where things ended up. If you don’t have saucer or do not want to glue them together you can skip this step.
Secure the wick in the center of the cup using either hot glue or wax adhesive.
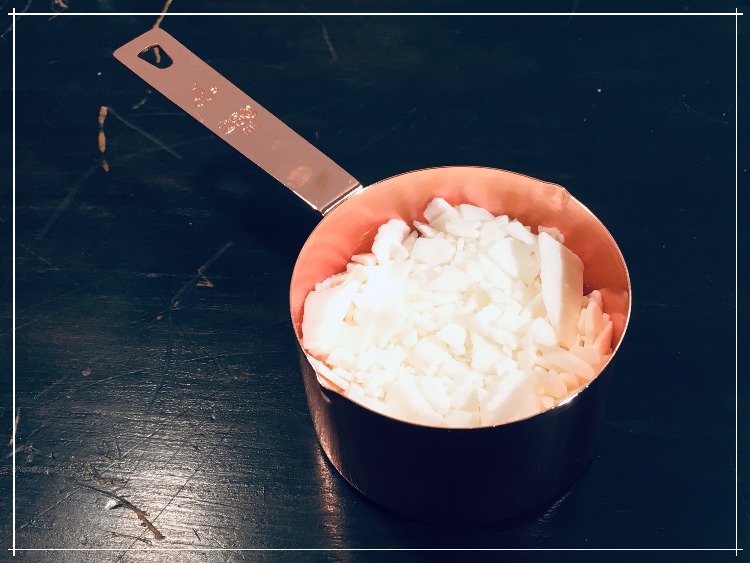
After letting the glue set I broke out the measuring cups. It took approximately one cup of soy wax flakes to fill this teacup. Now, if you aren’t sure how much your particular cup needs, take the cup you are planning to make your candle in and use two scoops. Once the wax is melted it will fill your cup perfectly to the brim.
Set your wax aside for a moment.
Second Create Your Candle
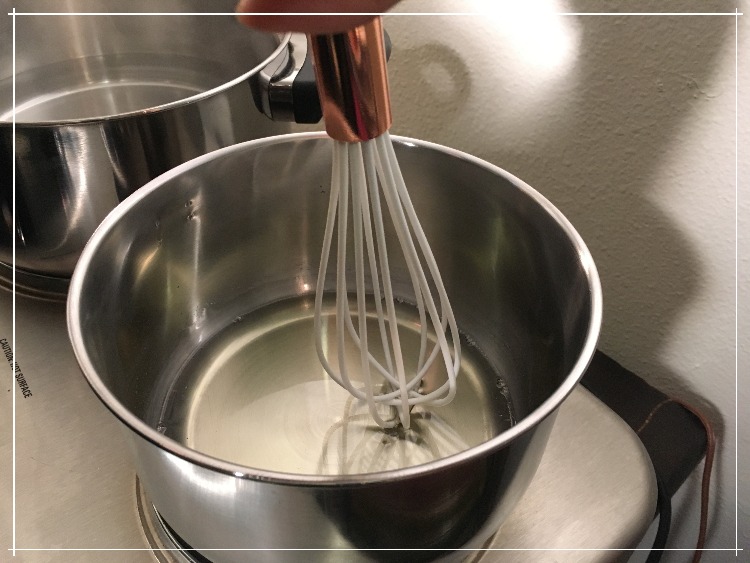
Grab your two pots, one pot should be able to fit inside the other. Put some water inside of the larger pot, I didn’t really measure. I used enough that it would reach the bottom of the smaller pot. You don’t want any water inside the smaller pot, so be careful not to mix the two.
Place the smaller put on top of the water inside the larger pot and turn your burner to high.
Grab the wax you measured out and dump all of it inside the small pot. Get your handy, dandy thermometer ready!
You’ll have to babysit the wax a little. Once it starts to melt it will go pretty fast. Stir the wax occasionally until it’s all melted. Once it reaches a temperature of 165 degrees, remove from heat.
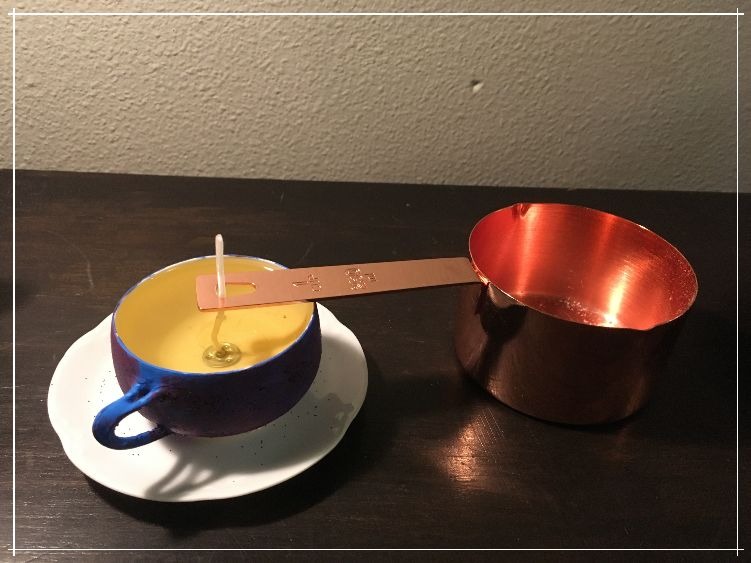
Get your measuring spoons and essential oil. I personally added ¼ teaspoon of Ylang Ylang, ½ teaspoon of rose and ½ teaspoon of tea tree oil. Mixed them all together for about 30 seconds.
Make sure your cup is on a flat surface as you pour your melted wax into the cup. Pour the melted wax into the cup as slowly as you can.
Once the wax was poured my wick kept falling over. I had to improvise a little to get it to stand straight up. There are several tools to do this, including using a pencil to let the rest against it. Unfortunately my cup was too small for that so I had to get creative. Don’t be afraid to improvise!
That’s it! Let your candle sit and harden overnight. You can also place it in the refrigerator, I didn’t though. My cup was too full to move it safely through the house without spilling.
Tips and Tricks
By the time it arrived at its destination it was no longer glued, so that did not work out as well as I hoped. If you are planning to leave it on a shelf after you are done it should be fine.
I mentioned this earlier, don’t be afraid to improvise a bit. You never know what you might discover.
If you aren’t sure about a combination of scents. Test it on a cotton ball!
Have a paper towel on hand. When you are done stirring and pouring you don’t want wax and oil all over the place a
What Now?
Trim the wick! That’s it!
I gifted mine as I mentioned early and give it to my lovely manager. She works hard and has been amazingly supportive! If you are gifting it, wrap it up and take your beauty to the new owner. If you are keeping your candle, lit it and let the amazing scent over take you.
The great thing about this candle is one: you know exactly what scents are used. Two: it is all natural! A lot of store bought candles have a lot of toxins in them and if you have cat, you probably heard diffusers are harmful. This is a great alternative to keep your home smelling nice without harming anyone one who lives there.
Naturally its fire though so be careful!! Enjoy my fellow awkwards!!
Happy Crafting!